In this article we will review the process of adding time entries to PPM Express Time.
By adding time entries users report time spent on their projects.

2. Create a new entry. This can be done in different ways:
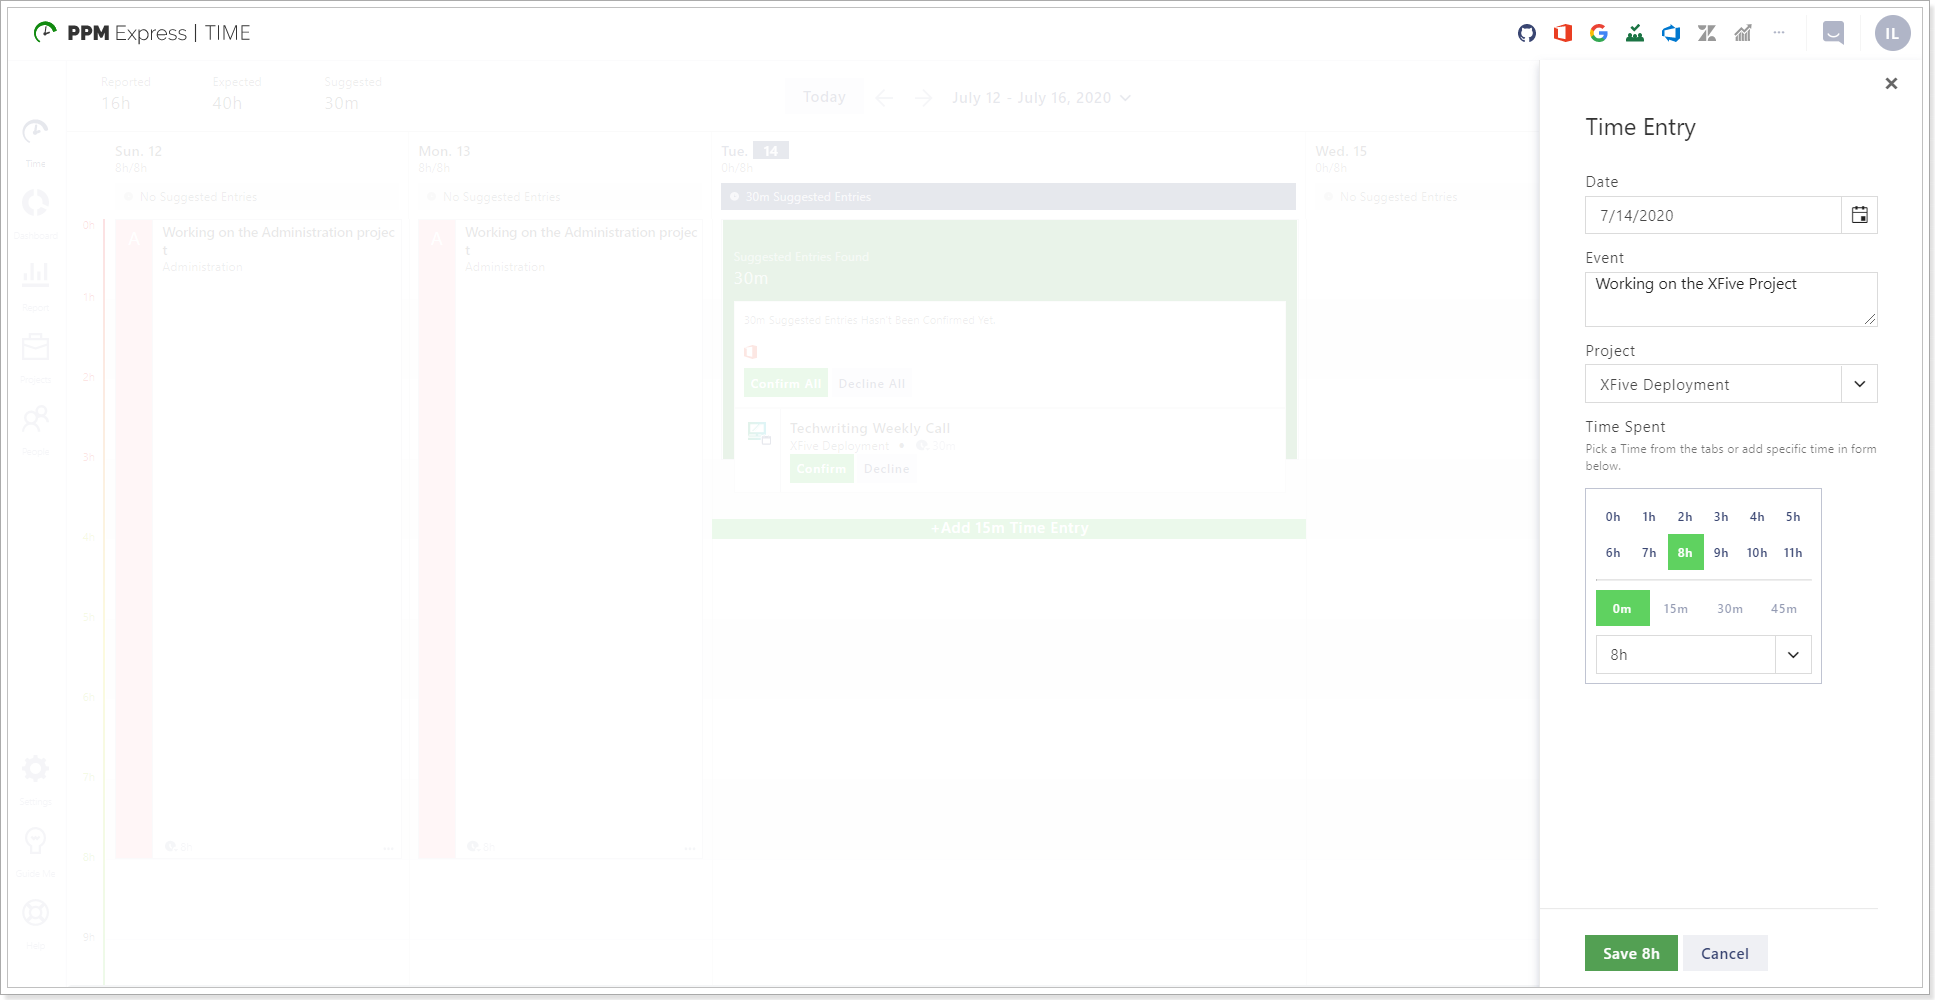
- Click and drag. Click at any place in the corresponding date column of the timesheet and drag the mouse down until the green box will show the necessary amount of time. As soon as you release the mouse button, the Time Entry menu will appear, allowing you to continue editing your entry.
- Add time entry button. Click at any place in the corresponding date column of the timesheet to focus on it. After that, use the Add time entry button in the lower right corner of the page to open the Time Entry menu. Note, that in this case you will also need to enter the duration of your entry manually.
- Double click on the necessary date in the timesheet.
3. In the Time Entry menu, fill in the Event field with a short description of the task done.
4. Choose a project or an out of office time type (vacation, sick leave, etc.) from the Project dropdown.
Please note: The projects in this list are added by your Administrator or Project Manager.
5. The time period currently selected for your entry is shown on the green Save button below. If needed, correct it using the Time spent selector. This can be done by picking the necessary amount of hours and minutes on the selector or choosing the exact amount of time via the dropdown below it.
Please note: The Time spent dropdown also allows entering the time manually.
6. Click the Save button to save your entry. The newly created time entry will appear in your timesheet.

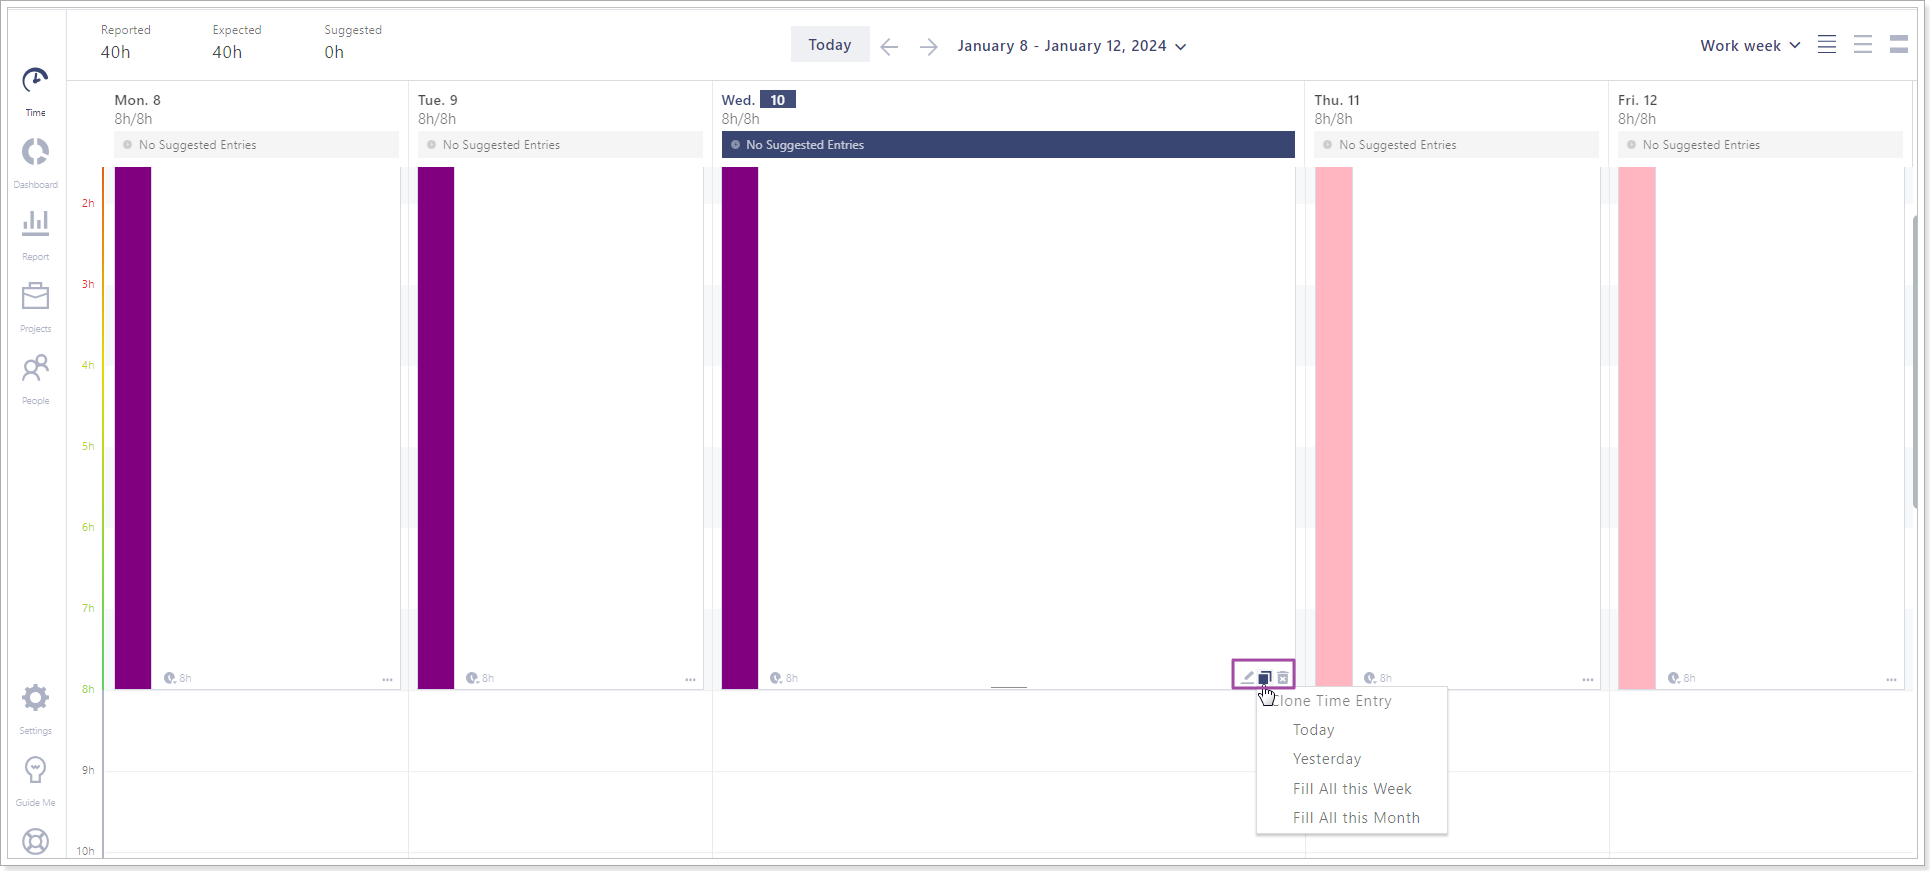
When the time entry is saved, it can be edited, cloned, or deleted. You can clone the time entry for today, yesterday, for all this week, for all this month.

