As there are different Project types and approaches for Project management, you might need a different set of Project sections to manage your Project. The set of Project sections may differ for an IT project and an internal Project, for example. PPM Express allows creating a separate layout for each Project type.
Users who create and manage configuration on the tenant level can create several layouts with a certain set of Project sections and configure the sections themselves, hide default fields and add new custom fields for the sections, as well as change the position of the columns in the sections for each Project type.
You can create as many layouts as needed and choose a default one that will be applied to all newly created Projects, Portfolios, etc.
Project Managers can then apply the required layout to their Projects. This helps standardize how Project Managers work on their Projects and the data they are expected to have within a certain Project type.
In most scenarios, users would like to have the same configuration of Project, Portfolio, Program, Business Challenges, Ideas, and Resource Dashboards across their Projects, Programs, Portfolios, etc. To avoid manual work and save time on the configuration of these pages, PPM Express allows the creation of layouts that can be later applied to Projects, Portfolios, Programs, Business Challenges, Ideas, Roadmaps, and Resource Dashboards.
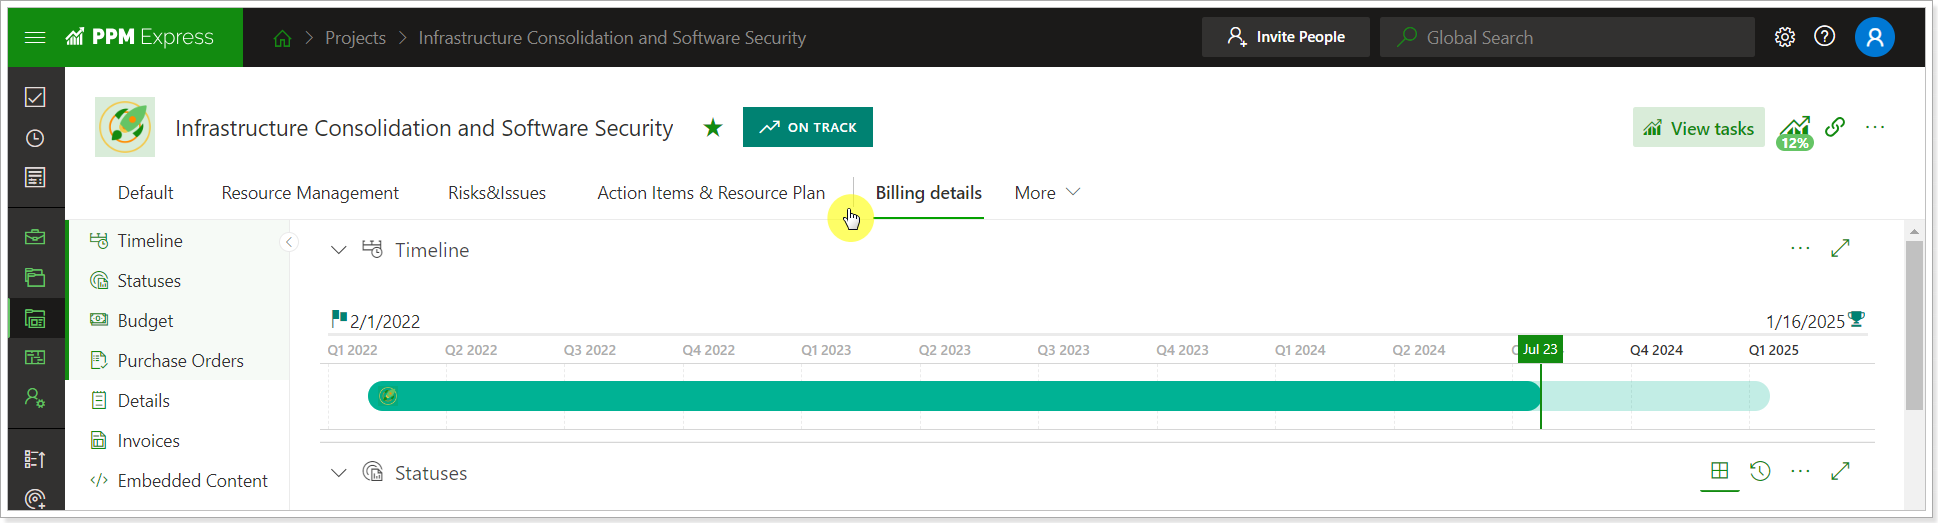
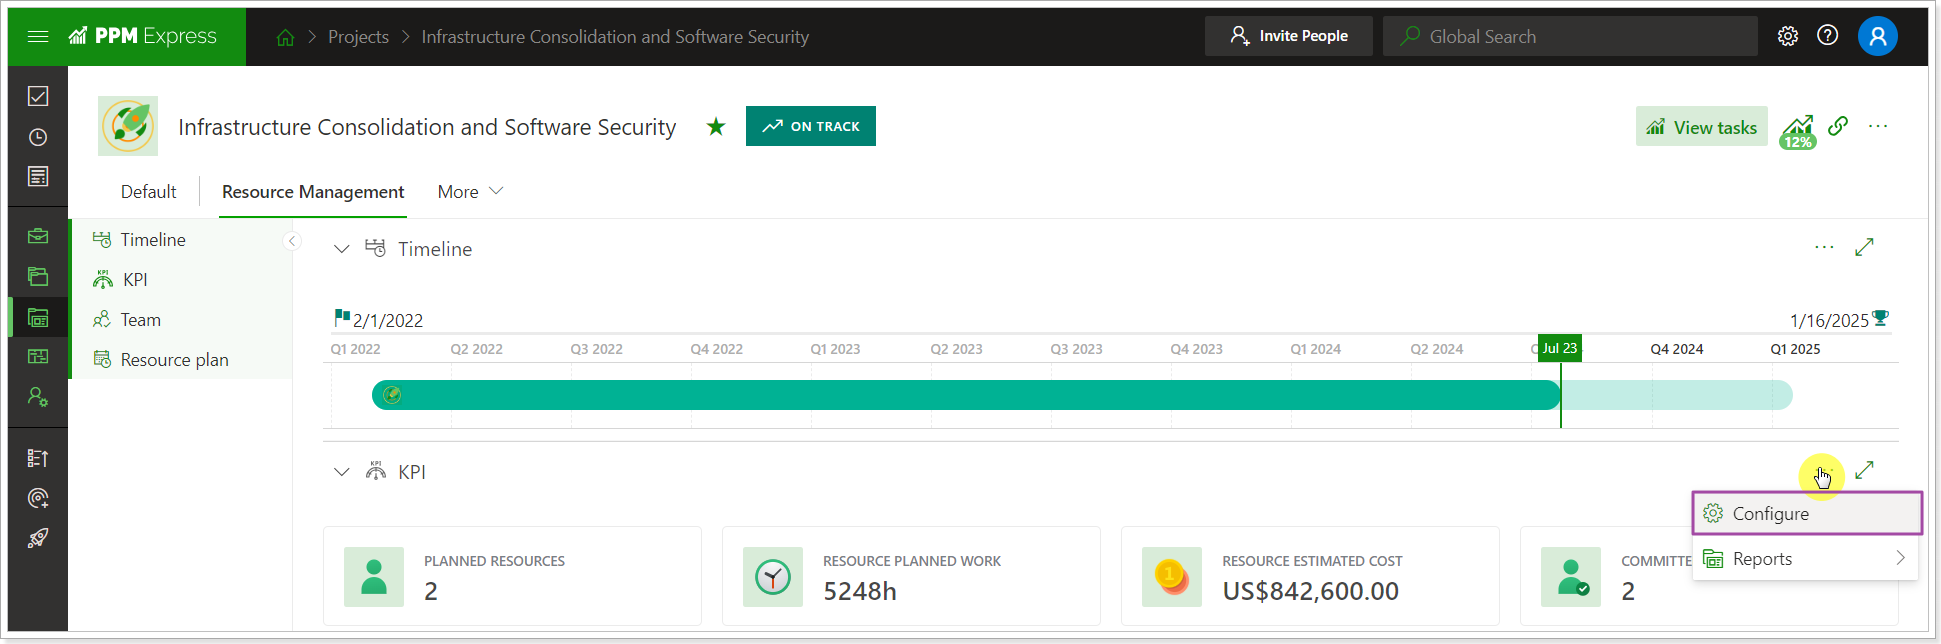
Views are used to quickly switch between a certain set of Project sections, allowing Project managers to view, analyze, and edit only those sections that they need at the moment (for example, Resource Plan and Schedule, Actions Items, and Risks).
Required permissions to create and apply layouts
To create and apply layouts, PPM Express users should have corresponding permissions.
PPM Express permissions for users are managed via the People Management section (PPM Express Administrators have a full set of permissions and can view/edit everything within the tenant).
1) Users with 'Manage Configuration' permission and permission to edit a Project (or other PPM Express entities) can create and save new layouts for the whole PPM Express tenant.
'Manage Configuration' checkbox is ON by default for the user who registered PPM Express tenant.
For the rest of the PPM Express users, this setting is OFF by default and can be turned on by PPM Express Administrator in the People Management section.
2) Project Managers can apply layouts to their Projects.
3) Users with edit/collaborate on rights for 'Portfolio', 'Program', and 'Project' as well as users with View All permission cannot create, save or apply layouts.
We will review Project dashboard layouts as an example, but the steps to create and apply the layouts are the same for other pages.
Project dashboard page layouts
To create a layout, perform the following:
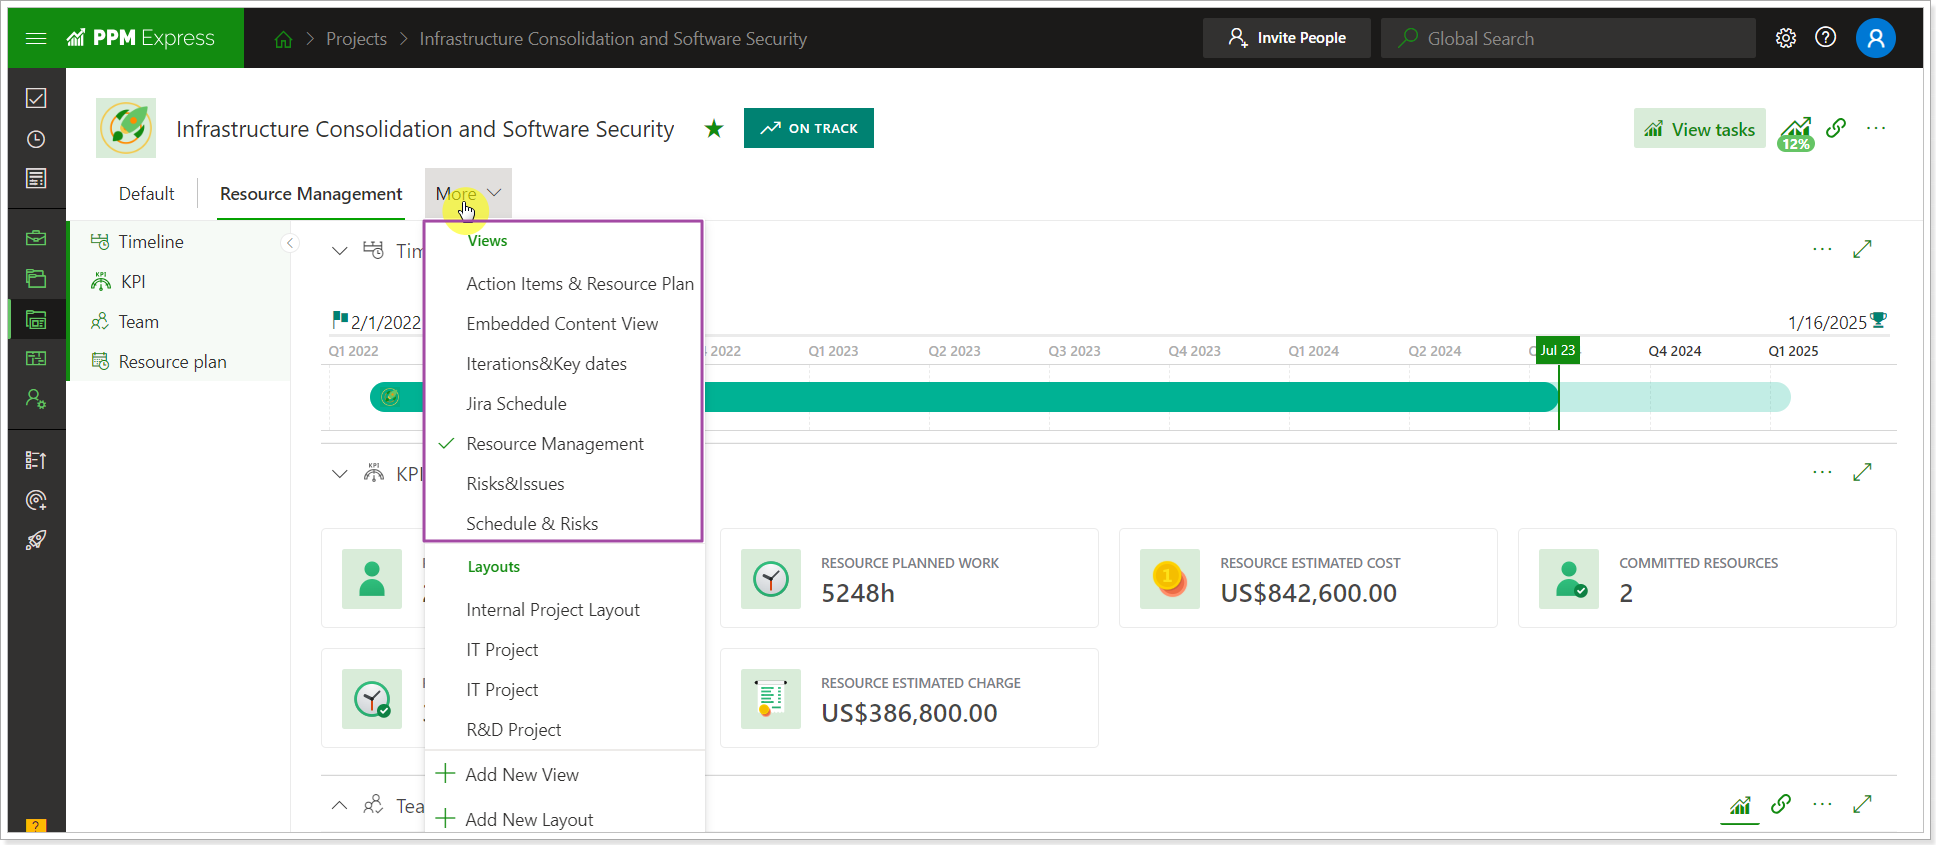
1. Open the Project dashboard, click More and select the 'Add New Layout' option.
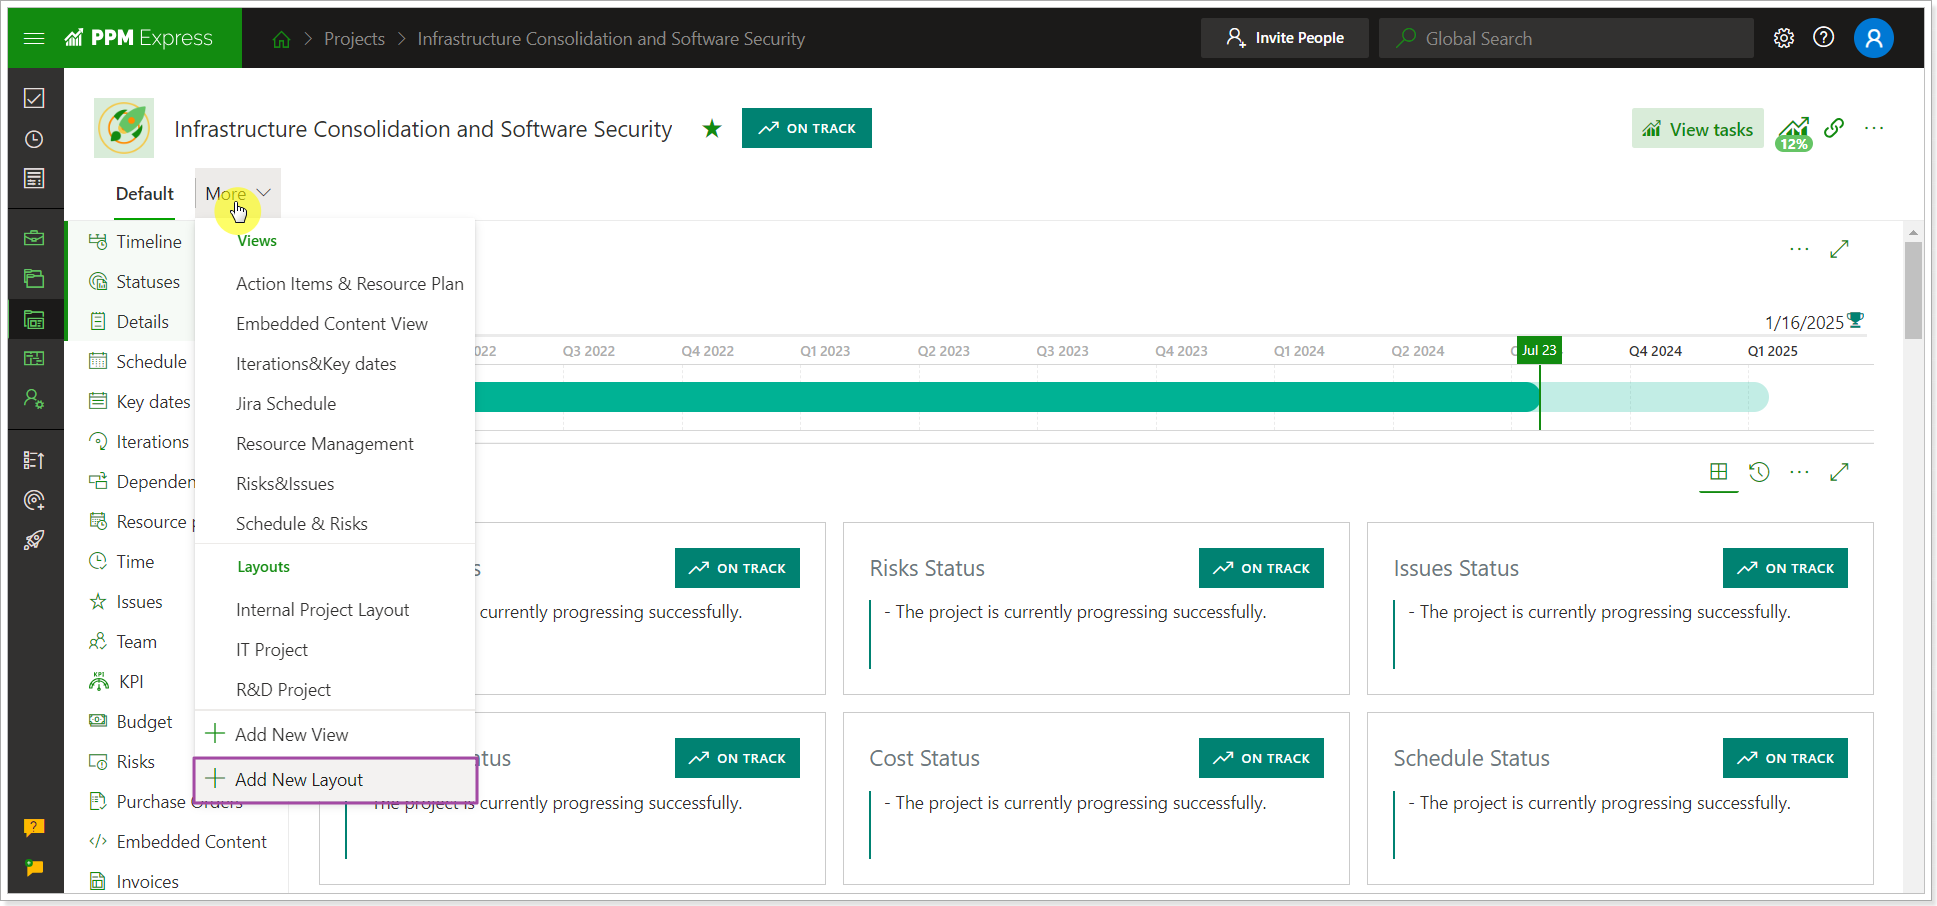
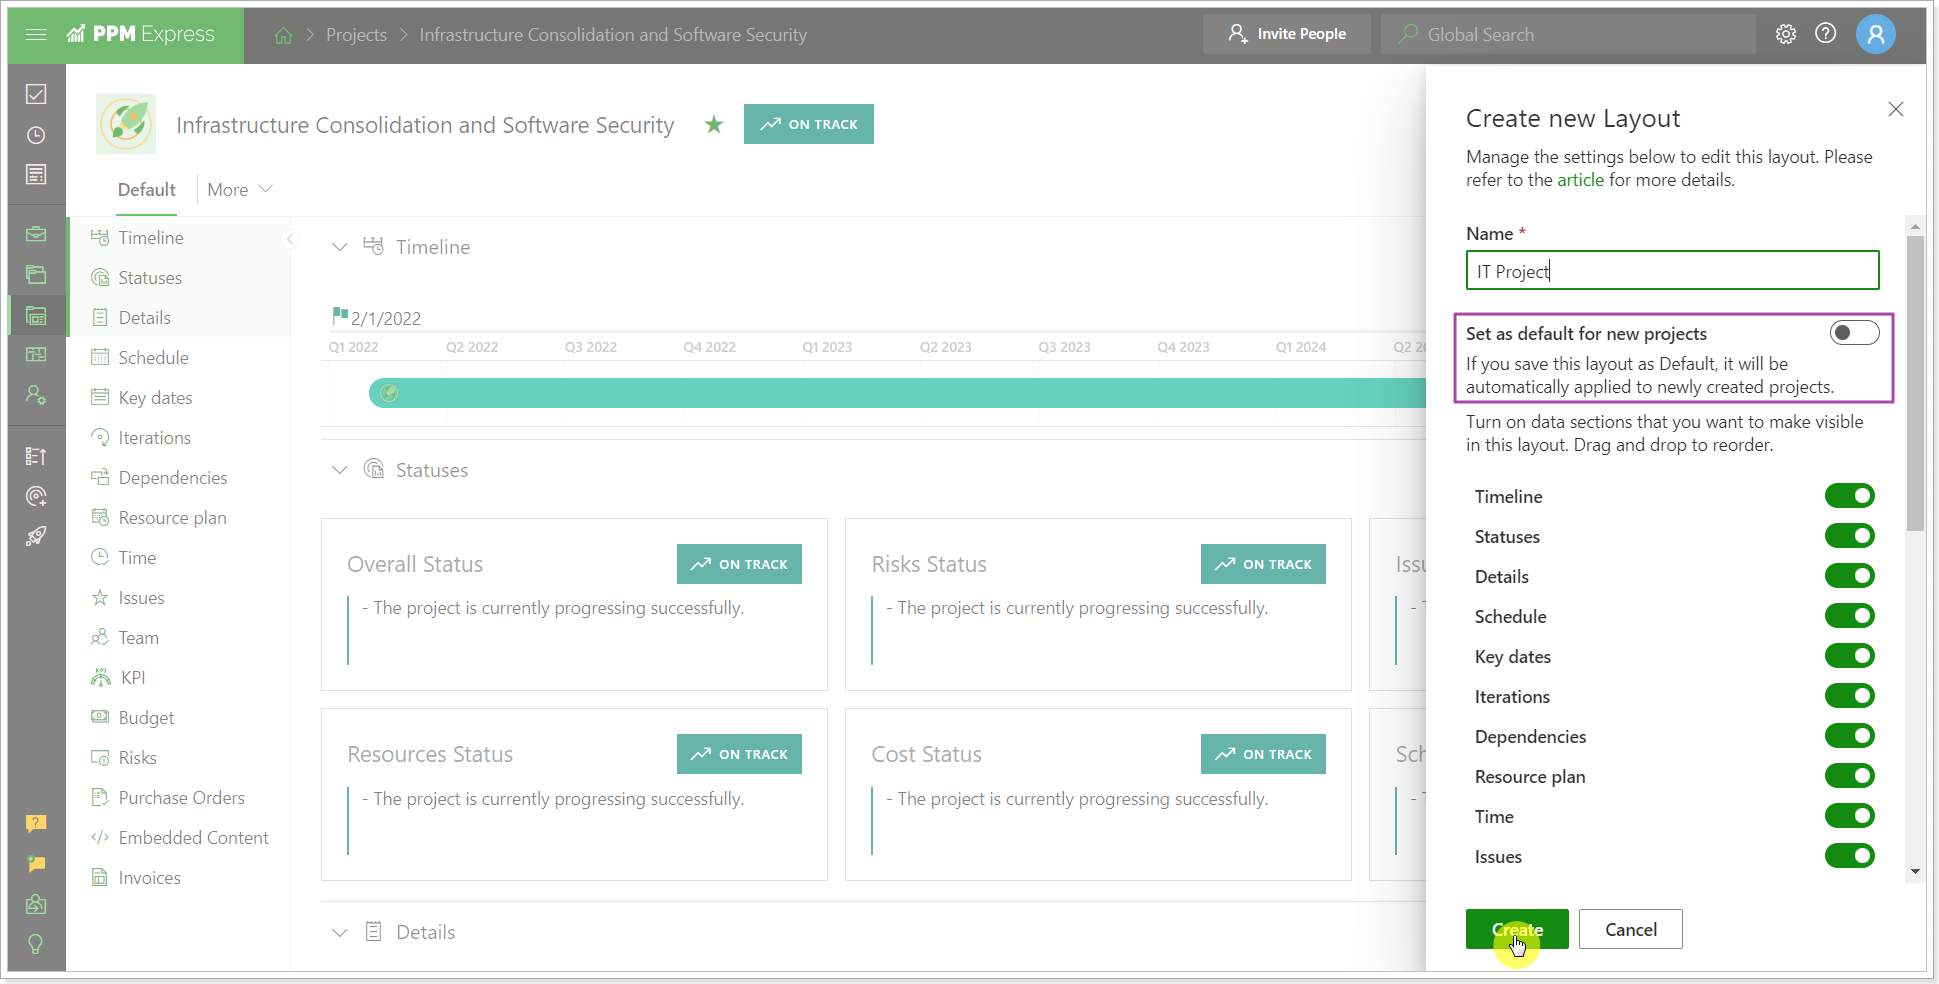
2. In the 'Create new layout' window, provide the name for the layout, and select the set of Project sections you need to include. You can drag and drop the sections to reorder them as needed.
If you save this layout as default, it will automatically apply to newly created Projects.
Click Create when you are done.
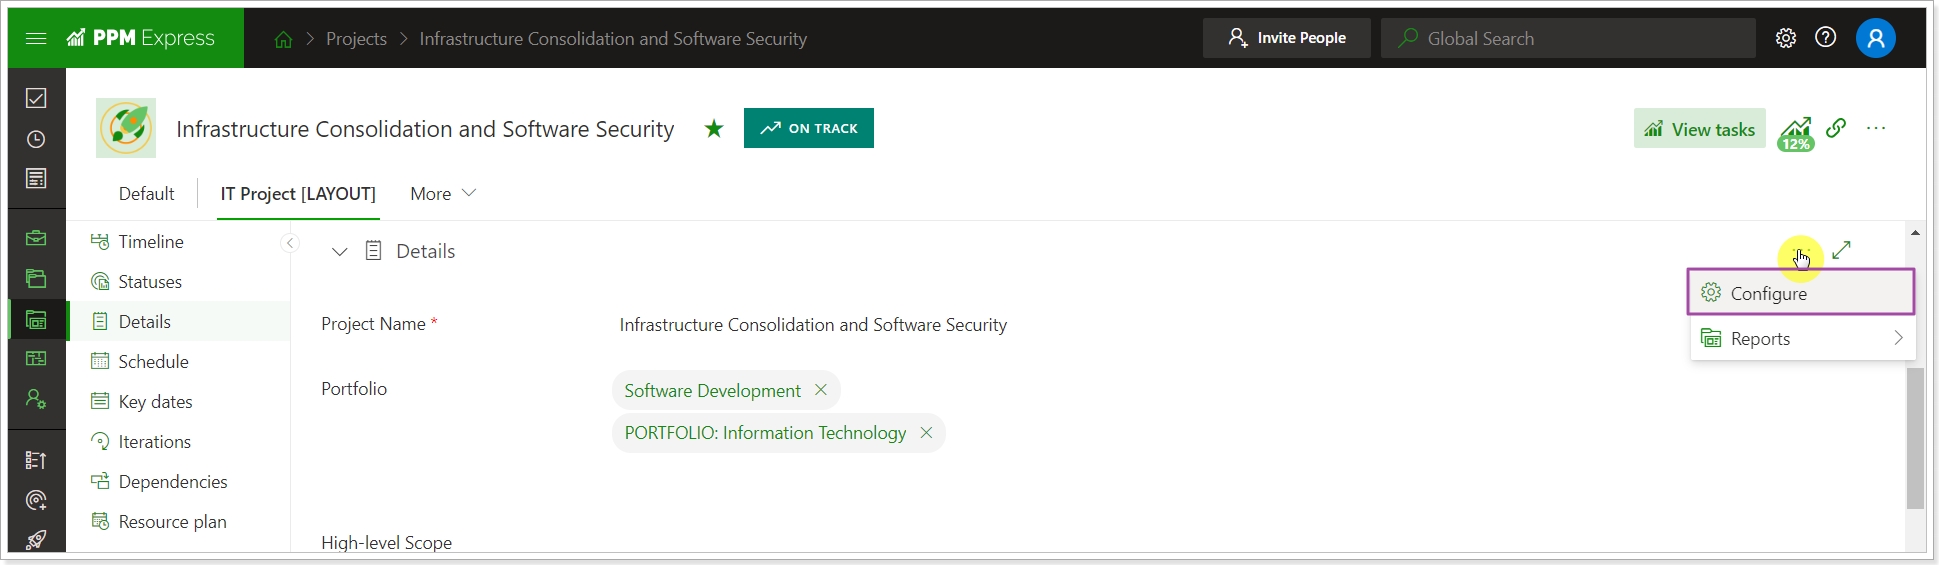
3. The newly created layout is applied to the Project dashboard at once.

Now you can hide default fields and add new custom fields for the sections, as well as change the position of the columns in the sections.
To find more information on how to configure Project dashboard sections, please refer to the Project Dashboard article.
As you finish configuring the Project dashboard and its sections (changing the columns as required), this configuration will be saved automatically for the selected layout.
Users who manage configuration on the tenant level can update the layouts, edit or remove them.
As the layout is created, Project Managers can select to apply it to their Projects using the 'Apply Layout' option on the right.
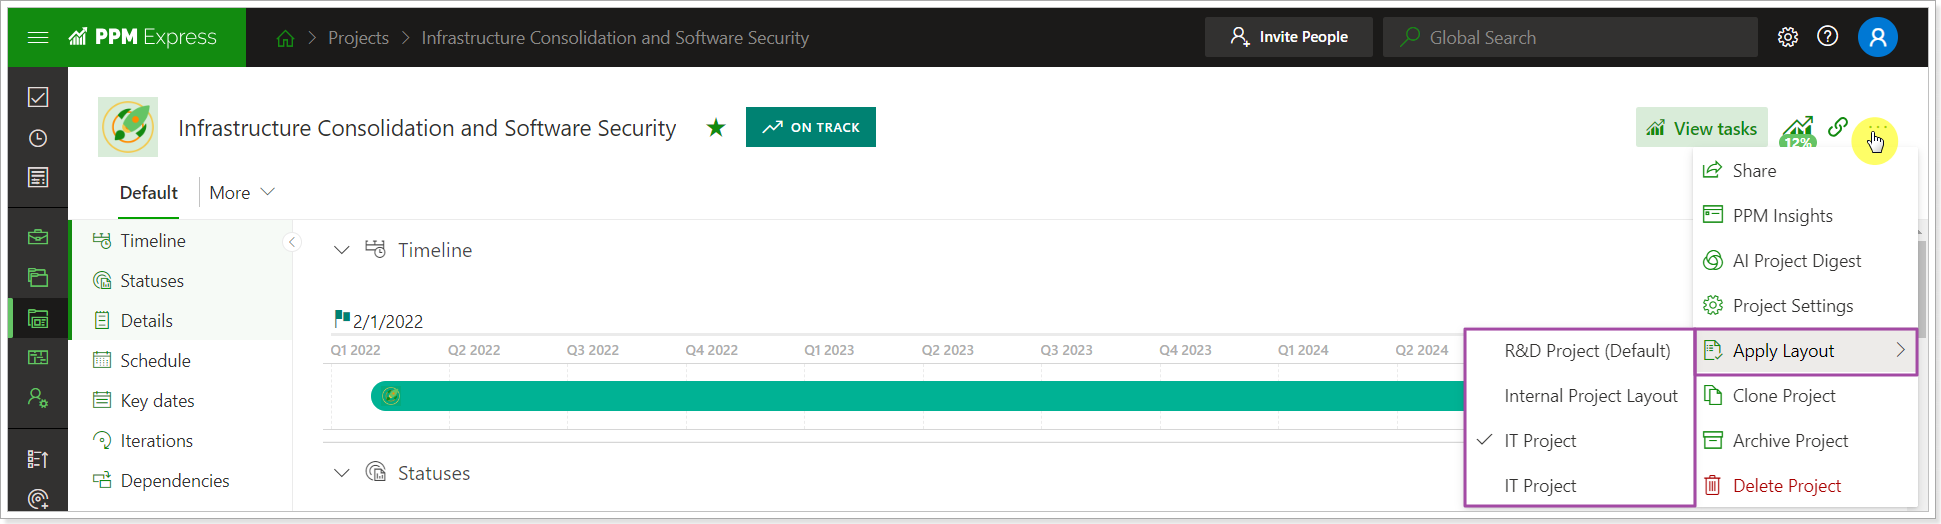
The layout that was applied to the Project is marked on the 'Apply Layout' menu.
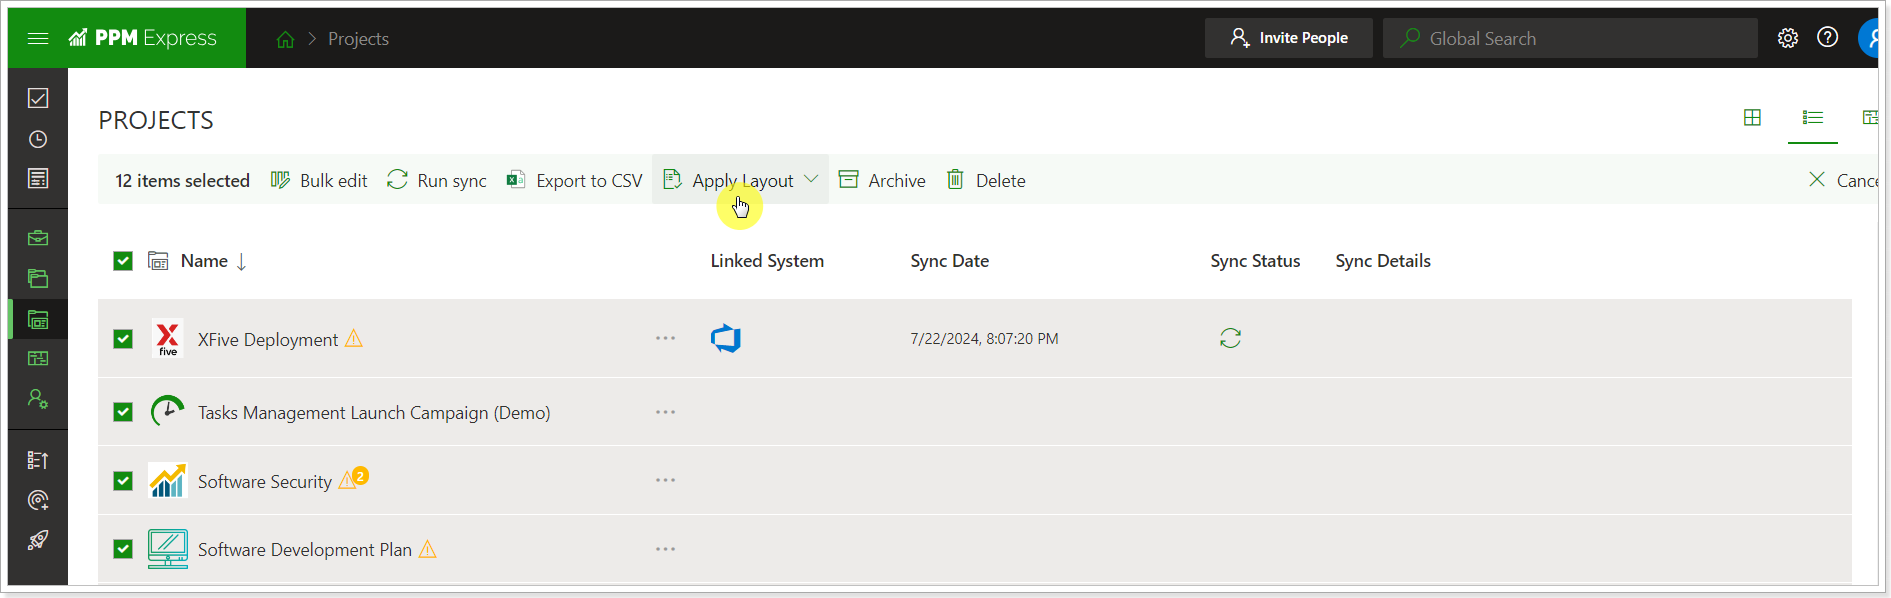
To apply a Layout to a group of Projects in bulk, open the Projects Page, and select Configurable table view.
Select the Projects you would like to apply a layout to. Click the Apply Layout button, and click on the required layout to apply it.
The following Project dashboard sections cannot be customized:
Teams section - this section is non-editable. Data for this section is retrieved from the source Project during synchronization.
Budget section – this section uses the Financials app allowing you to edit your Portfolio budget. Viewing or editing budgets can only be done by the users, who have Manage budgets permission enabled in their account settings.
The following Portfolio dashboard sections cannot be customized:
Budget section – this section uses the Financials app allowing you to edit the Portfolio/Program budget. Viewing or editing budgets can only be done by the users who have Manage Budgets permission enabled in their account settings.
Video Guide for Views
Required permissions to create and apply views
To create and apply views, PPM Express users should have corresponding permissions.
PPM Express permissions for users are managed via the People Management section (PPM Express Administrators have a full set of permissions and can view/edit everything within the tenant).
1) Users with 'Manage Configuration' permission and permission to edit a Project (or other PPM Express entities) can create and save new views for the whole PPM Express tenant. However, only Project Managers can rearrange or include certain fields in the Project section in the Default view. In this case, users with Manage Configuration and Edit Project permission can only create new fields or edit existing fields.
The 'Manage Configuration' checkbox is ON by default for the user who registered the PPM Express tenant.
For the rest of the PPM Express users, this setting is OFF by default and can be turned on by the PPM Express Administrator in the People Management section.
2) Project Managers can switch between the existing views within their Projects and pin the views to the Project header.
3) Users with edit rights for 'Portfolio', 'Program', and 'Project' can switch between the existing views on the Projects they have permission to edit.
4) Users with a view all/collaborate on permission cannot create views. They can switch between the pinned views only (all other views are hidden).
We will review Project dashboard views as an example, but the steps to create and use the views are the same for other pages.
Project dashboard views
Project views are part of the Project dashboard header. The default view is always pinned to the header.
To create a new view, perform the following:
1. Click More and select the Add New View option.
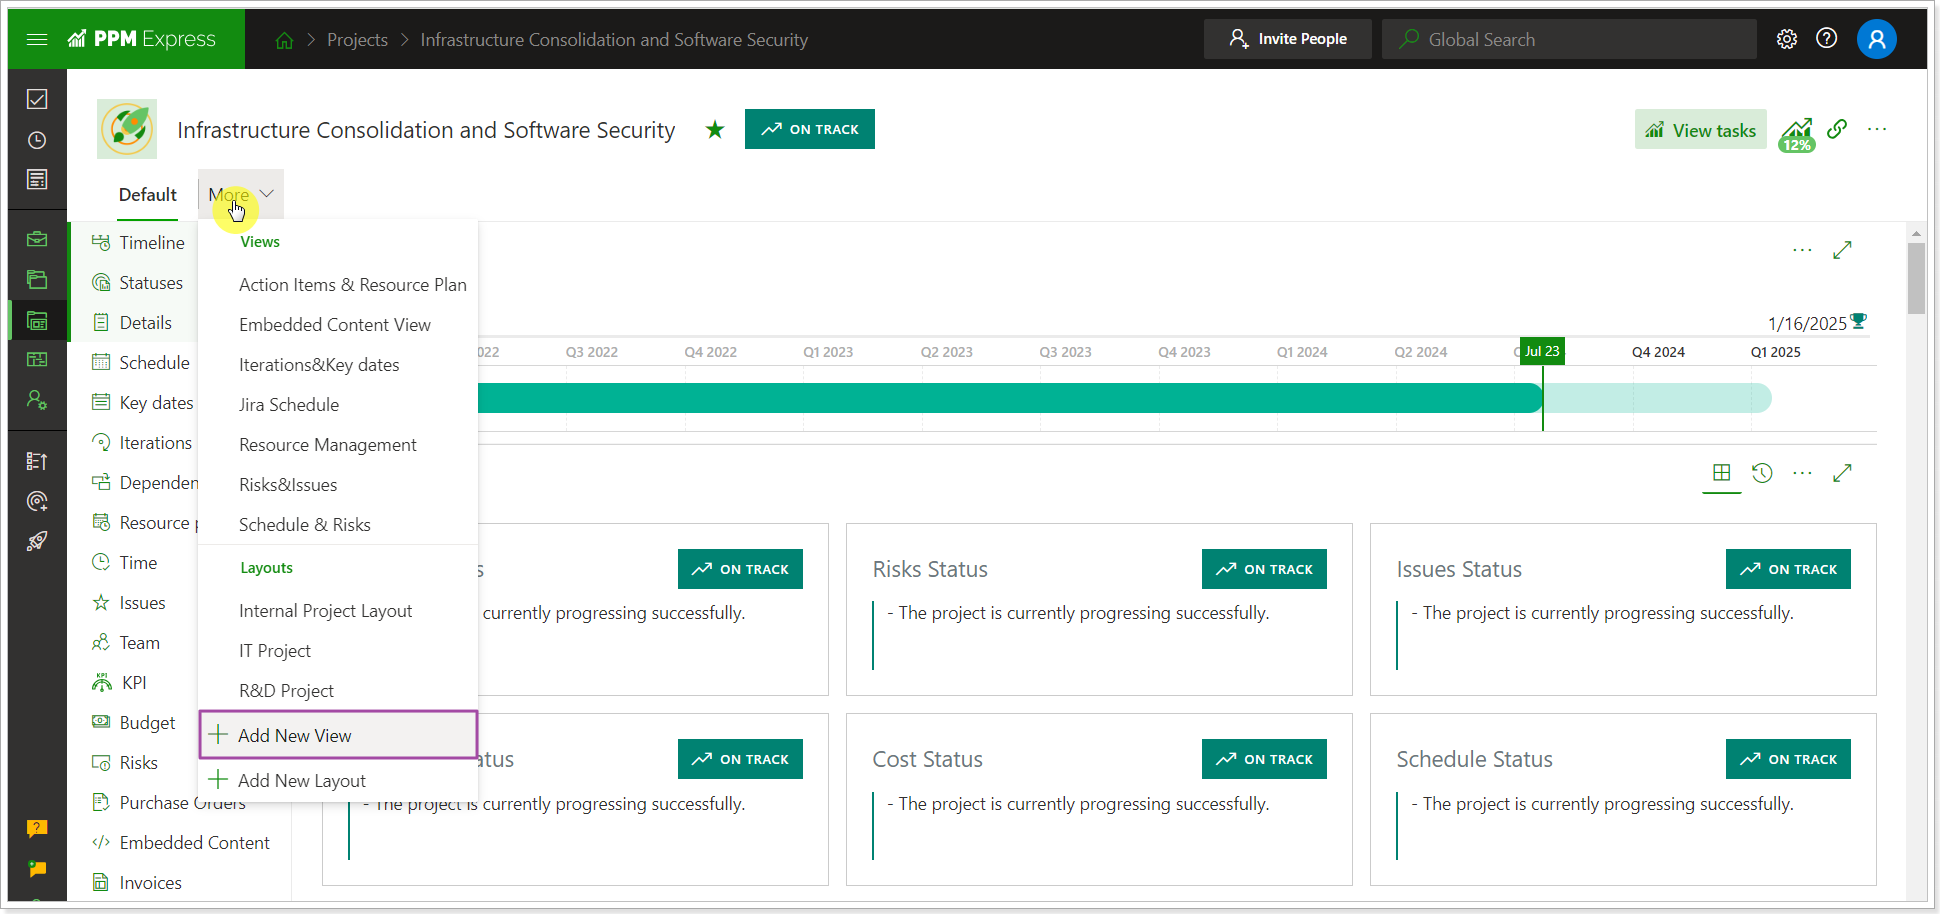
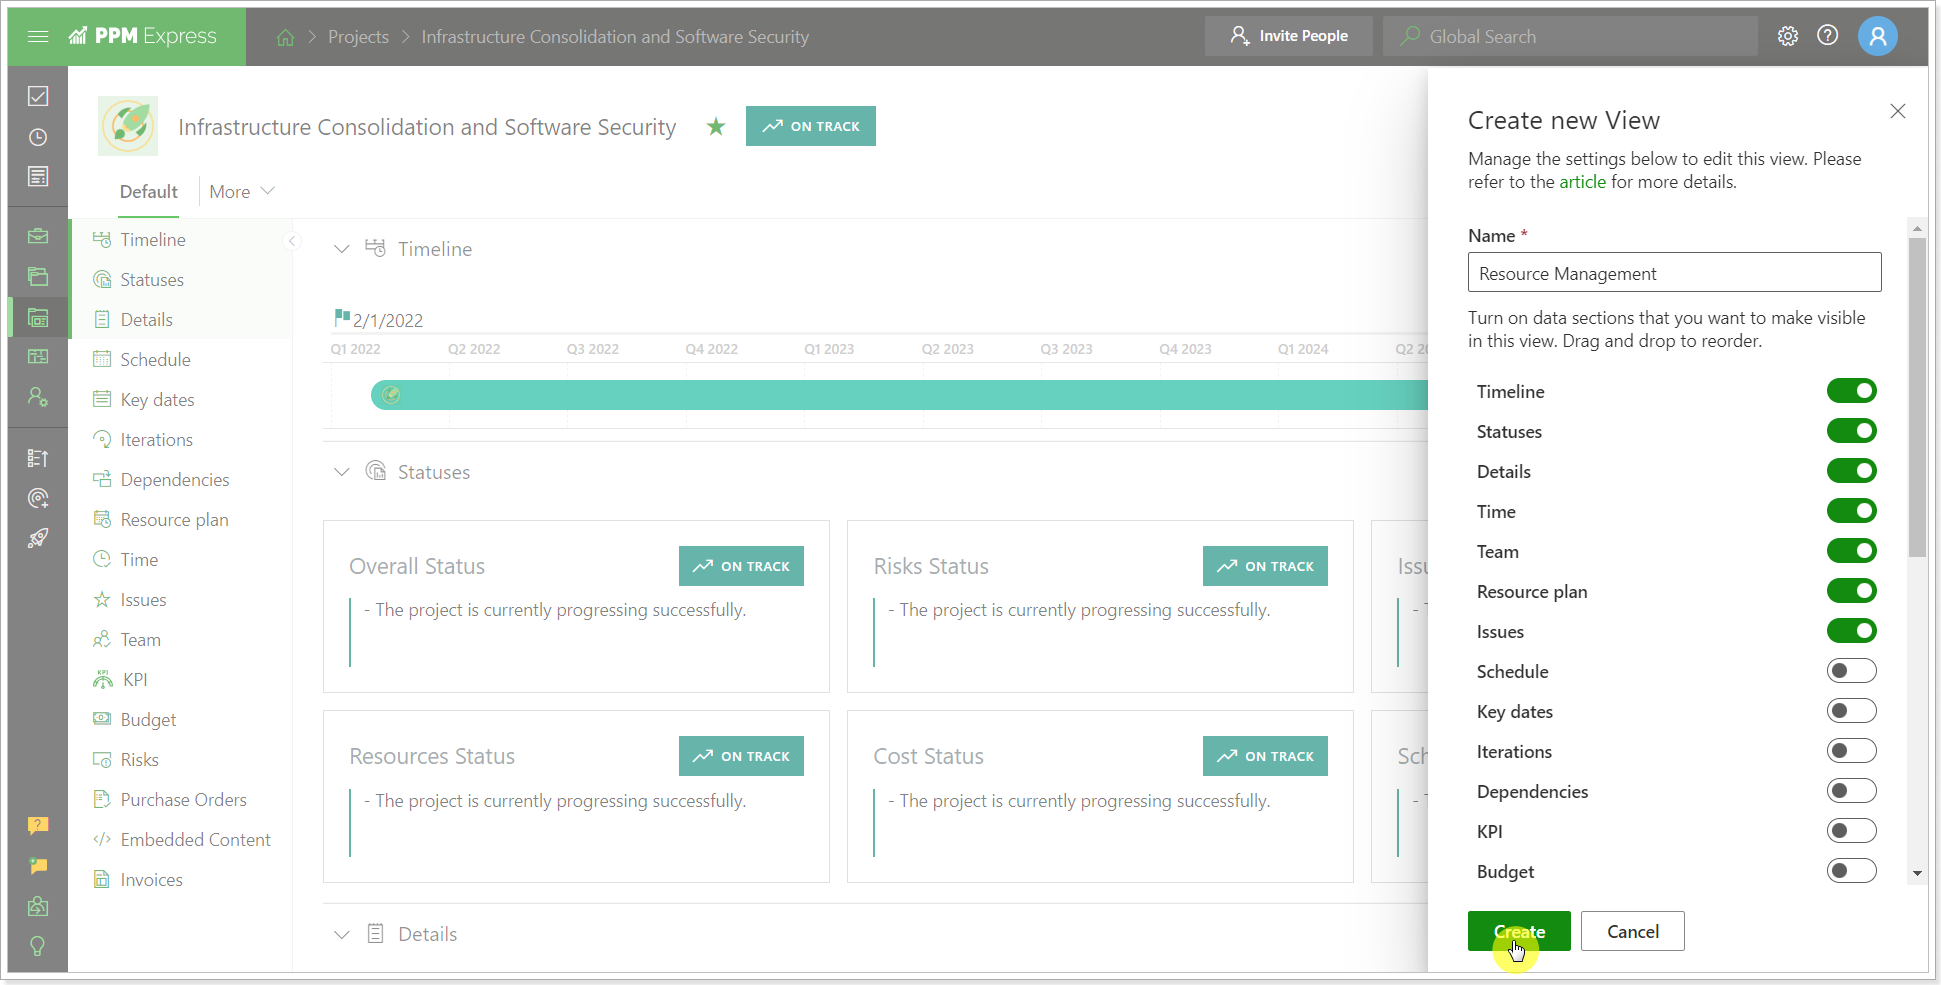
2. Type in the view name.
3. Select the Project sections you want to include in the view. You can use drag and drop to rearrange their order.
4. Click Create.
Once the view is created, it is added to the Project dashboard header.
Now you can hide default fields and add new custom fields for the sections, as well as change the position of the columns in the sections.
To find more information on how to configure Project dashboard sections, please refer to the Project Dashboard article.
As you finish configuring the Project dashboard and the columns for the sections, this configuration will be saved automatically for the selected view.
If you need to select a different view, click More and select the required view from the drop-down.
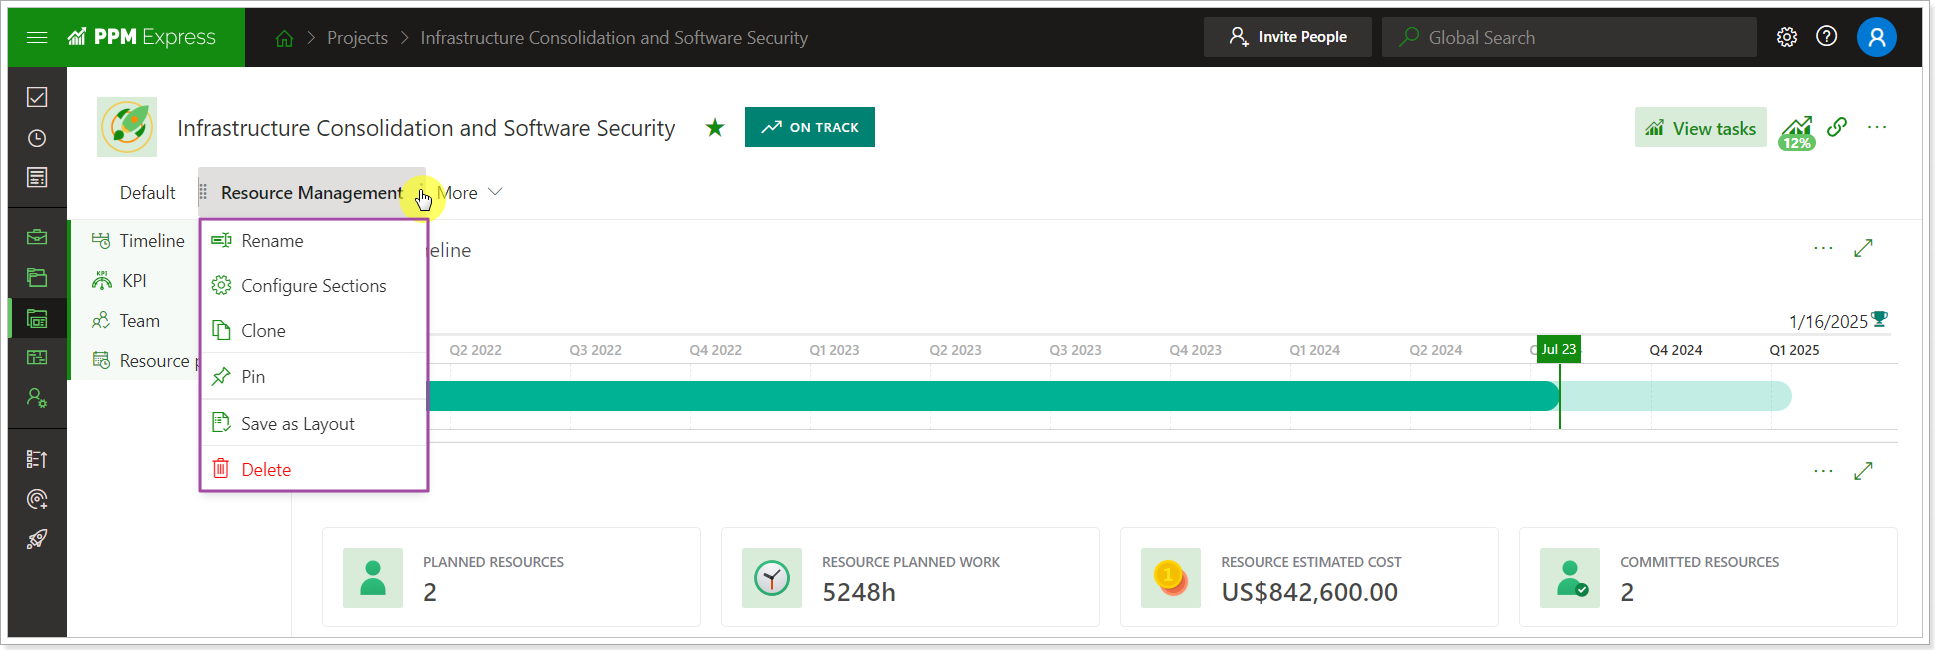
When the view is selected, a set of actions become available by clicking on the view:
- Rename. This option allows renaming the selected view.
- Configure Sections. This option allows you to add or remove required Project sections from the view and drag and drop them to reorder them as needed.
- Clone. This option allows the creation of a complete copy of the selected view.
- Pin. This option allows you to pin the selected view to the Project header. When a view is pinned, all users with access to the Project can switch between the pinned views unless a specific view is set for a user on the People Management page or in the 'Share' panel. This feature is available per Project. The views can be pinned by the Project Manager per Project. This setting is not shared between Projects. And drag-and-drop option is available for pinned views.
- Save as Layout. Allows saving the selected view as a layout.
- Delete. Allows deleting the selected view.
The full list of these options is available for Project Managers with Manage Configuration permission. Project Managers, without this permission, can see available tenant-wide views, pin views to the Project header, and edit their default view. Users with Manage Configuration and Edit permission for the Project can create and edit views but cannot pin/unpin them. These changes are applied to the whole tenant.
The selection of views is preserved per user. If you close the page and re-open it, the views selection will be on the header. If you need to remove the views, switch to the Default view. Pinned views will be available on the dashboard header until you unpin them.
Pinned views are separated from the unpinned ones with a slash. If you select the view and use drag and drop to move it to the pinned ones, it will also be pinned.