
In this article, we will review how to create and manage Project tasks in PPM Express.
Creating Project tasks
To create Project tasks, perform the following:
1. Open the Project where you would like to add tasks => click on the View Tasks or the Task Management icon in the left upper part of the Project dashboard.

Also, you can access the Project Tasks page by clicking the View PPM Express Tasks option on the Schedules section of the Project dashboard.

2. Navigate to the PPM Express Tasks section and click the New Task button.
3. On the Create Tasks page, provide the following information, some fields are required:
- Task name
- Description
- Group (groups can be created in advance or after the tasks are created. They are used to sort and organize your tasks. All newly created tasks will be added to a default 'Backlog' group)
- Start date
- Due date
- Duration
Note that the Start Date, Due Date, and Duration fields are interconnected; if there are any changes to one field, the values for the other fields will be recalculated accordingly.
By default, Start and Due date values are filled in automatically on task creation, taking into account the Project Start date (if there is no Project Start date or it is in the past, the current date will be used), and the Duration is set to one day (if you do not set your own values).
Note that Tenant-wide Calendar settings and exceptions are taken into account when the Duration is calculated (only workdays are taken into account; weekends, holidays, and exceptions are not taken into account when the duration value is calculated). - Progress %
- Assigned to (all active PPM Express resources will be available in the 'assigned to' list; inactive resources do not appear in this list)
- Is Milestone (if this setting is on, a key date will be created out of this task on the Project Dashboard automatically)
- Priority
- Status
Note that Tasks status is calculated and set right after task creation or when the task information is updated. If the task is not updated for some time, the task status will be recalculated according to the Daily Summary Notification settings (Data Synchronization settings => Summary Notification => Daily Notification Schedule).
Note that Tasks statuses are calculated automatically by default. To disable the auto-calculation of the Key dates statuses, visit the Insights settings page. The statuses will be set according to the Tasks finish date, taking into account the current date.- On Track – Finish Date is greater or equals Today / if there is no Due Date, but the Progress is greater than 0 and is less than 100%.
- At Risk – The task is late for less than 10 days (from Today);
- Critical – The task is late for more than 10 days (from Today).
- Done - the task is marked as Complete.
- Completed
- Effort
- Story points
Click the Create Task button.

The task will appear on the Project Tasks page.
Calendar exceptions (such as weekends, holidays, or shortened working days) affect task scheduling in PPM Express.
Please note that when a task is created after an exception has been added to the calendar, the task dates will automatically shift according to the exception rules. However, if a task was created before the exception was added, the task dates will not be updated automatically. In this case, task dates remain unchanged unless adjusted manually.
To ensure that calendar exceptions are correctly applied to tasks, we recommend the following flow:
- Configure your tenant calendar, including all required exceptions.
- Create new tasks.
By following this sequence, all existing exceptions will be considered during task scheduling. If exceptions are added after tasks are created, the tasks will not automatically update. In this case, we recommend recreating the task.
Inline editing is available on this page for your convenience. For more details, please refer to the 'How to use inline editing' article.
The Search option allows you to find the Tasks you need quickly. For more details, please refer to the 'How to use the Search option' article.

Creating task groups
All newly created tasks will be automatically added to a default 'Backlog' group. This group exists in the PPM Express Tasks section by default.
After adding tasks, you can organize them into your groups to help break things up into phases, types of work, departments, etc.
To create Project task groups, perform the following:
1. Open the Project where you want to add tasks => click on the Task Management icon in the upper left part of the Project dashboard.
2. Navigate to the PPM Express Tasks section, click Actions -> Manage Groups.

3. On the Configure Task Groups page that will be opened, click the New Task Group button.

4. On the Create Group page, enter a name for the group, select the group color, and click the Create Task Group button.

To edit or delete the existing groups, navigate to the PPM Express Tasks section and open the Manage Groups menu.
On the Configure Tasks Groups page, navigate to the required group and select Edit or Delete.
Groups can be open and hidden. If you toggle the group switch to off, the group will be hidden, and the tasks included in this group will not be visible in the PPM Express Tasks section.

Moving tasks into groups
When the tasks and groups are created, it is possible to sort them into groups to start getting organized.
The easiest way to add tasks to the groups is to drag the task and drop it into the necessary group, selecting the position for the task within the group.
This option is available for the tasks table view only.
It is also possible to rearrange the order of the tasks within the group using the drag-and-drop option.
It is possible to select several tasks and move them to a certain group in bulk:
1. Select the required tasks.
2. Click on the Move to Group button on the taskbar. Click on the required group, and all selected tasks will be moved to this group.

Another way to add a task to a group is the following:
1. Open the task menu by clicking on the ellipsis button that is available for each task.
2. Navigate to the Move to Group option.

3. Select the required group, and the task will be moved there at once.
Also, if you click on any tasks, it will be opened for editing, and you will be able to select the required group there.
Managing project tasks
When the tasks are added, you can edit them one by one or in bulk (delete, copy, set up task dependencies, apply filters to filter out the tasks on the page, select the default views, and create your filters and views). For detailed information about this functionality, please refer to the Project tasks page article.
Also, it is possible to export/import tasks from one Project to another, you are welcome to find the detailed information in the How to export/import project tasks to/from .csv file article.
When the tasks are added, the task statuses section will become available on the Project Dashboard in the Tasks section.
If you click on the task number here, you will be redirected to the tasks page. Also, the tasks list on the Project tasks page will be filtered according to the selected value (for example, if you click on the number of Critical tasks, the tasks list will be filtered by late tasks).

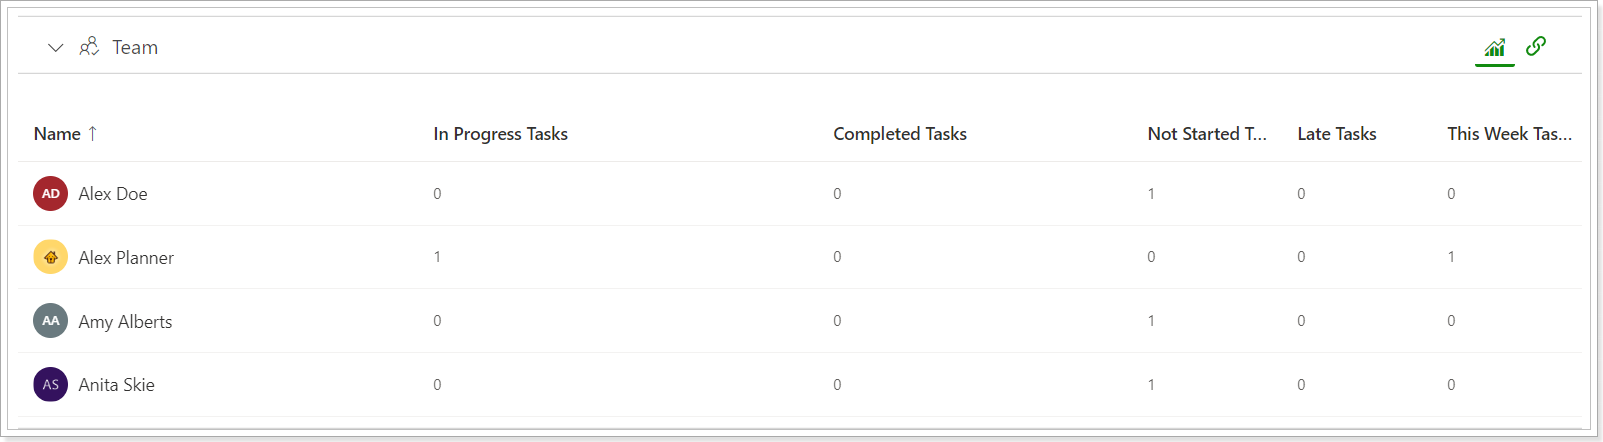
Also, when the users are assigned for tasks, the list of these users and the information for their task assignments will appear in the Team Project section.
On the Project tasks page, three views are available for the PPM Express Tasks section: table and timeline, and workload.


You can set the baseline for your tasks using the 'Set Baseline' option.

It allows taking a snapshot of your schedule that includes information about the Start Date, Due Date, Duration, Effort, and Original Estimate. If the information for these fields is changed, the baseline won't be changed and will remain the same, as it was set initially. If the task dates are changed, and you need to change the baseline, you can use the 'Set Baseline' option again, and it will be changed.
It is impossible to delete a baseline, but you can hide the Baseline from the timeline using the 'Style' menu.

Also, when the task is opened for editing, you can review the current information for these fields and compare it to the baseline in the Baseline section. If you open the task and navigate to the Baseline section, the Variance field will show the difference between the Baseline and the Current values.
When calculating the variance, PPM Express considers the Global Calendar Exceptions.
The fields can be exported/imported to/from a CSV file. However, these fields are calculated automatically, and if any changes are made manually in the file, they will be ignored when imported.

Also, you can add these fields to the List/Timeline view and review the information for all tasks there.

Tasks hierarchy
The tasks hierarchy is available for PPM Express tasks and includes the sub-tasks functionality and the manual roll-up (by clicking the Calculate Progress button) of the specific summary task fields (see the list of fields below).
The following options of the task menu can be used:
- 'Add subtasks' adds a subtask below the chosen task, the hierarchy tree will be expanded automatically upon adding a new subtask.
- 'Outdent' moves tasks a level up in the hierarchy level.
- 'Indent' moves tasks a level down in the hierarchy level.
- 'Insert task above' adds tasks above a chosen task. The task will be added to the same hierarchy level as the selected one.
- 'Calculate progress' performs the recalculation process and roll-up data to the selected task (option is available only for summary tasks). 'Calculate Progress' becomes enabled if one or several tasks are selected.

If the parent task is moved to another group, all related child subtasks will be moved too. When users select to delete a task that has subtasks, these subtasks will also be deleted together with the task.
When the default filter is applied, the tasks are shown as a list with the arrows next to the parent task, notifying that this task has a hierarchy that can be extended using this button. Also, you can use the Indent/Outdent and Outline/Collapse options to show/hide the sub-tasks.

If any other filter or pre-filter is applied, the parent tasks will not show the arrow button to expand the hierarchy at once; this option is hidden, and an arrow on the task icon is shown instead to notify that this is a parent task.

So, the tasks are shown according to the filter applied. If there is a need to expand the parent task, click on the ellipsis button and select the 'Expand Hierarchy' option. To hide the hierarchy, click the ellipsis button and select the 'Collapse Hierarchy' button. In this case, the Indent/Outdent and Outline/Collapse options will be greyed out.

This functionality has the following limitations:
- 10 hierarchy levels are supported.
- Drag&Drop functionality is available only for a collapsed hierarchy tree.
- Task hierarchy is not supported for editing in .csv files and the API.
- If the hierarchy tree is collapsed, the child tasks are not exported to the .csv file (only tasks that are selected and visible on the UI will be exported to .csv).
- If a predecessor is defined for a summary task, and this predecessor does not allow setting the summary task’s Start or Due Date as the earliest/latest Start/Due Date of non-summary tasks, then the summary task’s Start/Due Date should remain as defined by the predecessor even when “Calculate Summary Task” is clicked.
Calculation for task groups and Calculation of Progress (summary and sub-tasks)
1. The calculation of Progress for the task groups corresponds to the formulas used for summary tasks and Project rollup calculation.
The Project Settings -> Progress calculation for PPM Express tasks settings define which calculation type is used.
Also, these settings influence the distribution of assignments by day (in the workload view on the Tasks page). For more details, please refer to the 'Assignments by day' article.
By default, a formula based on Completed Work and Effort will be used, but Project managers can switch the Progress % formula for their Project to a different one as needed. These settings are applied per Project.
To open the Project Settings, click on the ellipsis button on the Project Dashboard -> Project Settings -> Progress calculation for PPM Express tasks.

For more details, please refer to the 'Progress for the task groups' article.
2. The Calculation of the task Progress feature includes auto or on-demand rollup calculation of the summary tasks and horizontal calculation for non-summary tasks.
When the auto calculation mode is on, PPM Express tasks progress, and the related fields will be recalculated automatically when the corresponding changes to the task fields take place.
If the Manual mode is selected to recalculate the task progress and the progress-related fields, users need to select the tasks and click the 'Calculate Progress' button to perform the roll-up calculation. The 'Calculate Progress' option becomes active when one or several tasks of any type are selected, summary or non-summary. If the selection of tasks includes summary and non-summary tasks, then for each task type, its own calculation will be performed, either a rollup or a horizontal.

The progress calculation mode is applied per Project. By default, all newly created Projects will have the Auto calculation mode enabled. However, if the project was cloned, and the original Project has the Manual mode selected, this setting will also be cloned to the new Project.
To change the calculation mode to Manual or Auto, open the required Project -> ellipsis button -> Project Settings -> Default Mode for new PPM Express tasks.

To set the mode to auto for all existing tasks (the ones that were created before the mode was switched to auto or created from .csv files), open the tasks page, and select the required tasks -> Set mode -> Auto.

A roll-up calculation of the summary task fields is available for the following existing fields for any available calculation type: by Effort, by Story Points, and by Average Progress.
- Effort
- Completed Work
- Remaining Work
- Original Estimate
- Story Points
- Completed Story Points
For more details on the calculation and rolled-up field with formulas, please refer to the 'Calculation of tasks Progress' article.
Tasks dependencies (predecessors)
PPM Express allows setting up task predecessors (dependencies), internal and external ones (cross-project dependencies). In this article, we will review the internal predecessors. For more details about external predecessors, please refer to the Cross-Project Dependencies article.
To set up task dependencies, perform the following:
1. Open the task you would like to set the predecessors for.
2. In the Predecessor field, select the task that should finish before the current task starts.

Also, Predecessors can be added and edited on a separate tab in the Edit Task window. There are more options here for setting predecessors. Click Add Predecessor.

Select the type of dependency. There are four types of dependencies:
- Finish-to-Start (FS): the predecessor task must finish before the successor can start (but the successor might start at a later date).
- Start-to-Start (SS): the predecessor task must start before the successor task can start (but the successor might start later, and the predecessor can be incomplete when the successor starts).
- Finish-to-Finish (FF): the predecessor task must finish before the successor task can finish.
- Start-to-Finish (SF): the predecessor task must start before the successor task can finish.
The Lag and Gap options are available for predecessors.
Finish-to-Start dependency with zero lag is used by default (it is also always used if you add predecessors from the Predecessor field on the Edit Task page). The Start date of the successor task will be changed to start when the predecessor task finishes.
When a new predecessor is added to a task, its Lag is set to 0 by default. The estimated date is the start date of the task defined according to the predecessor's Due date (for the Finish-to-start dependency) and the lag value that is set manually. If the lag value is changed, the estimated date is changed accordingly (also, if the estimated date is changed, the lag value is updated accordingly).
The Lag is set manually and is not recalculated when the task’s or predecessor’s Start/due Dates change.

Click Apply -> Save Task to apply the lag.
Predecessor Lag is a constraint. When a lag is set, it is impossible to move the task’s dates so that the gap between the predecessor and the task is less than the lag value.
However, it is possible to move the task’s dates so that the gap between the predecessor and the task is more than the lag value. In this case, lag remains unchanged and does not correspond to the actual gap between the predecessor and the task. The gap here is a temporary manual change of the successor's Due date. If the predecessor's Start/Due date is changed, the gap will be lost and switched according to the predecessor's start date (or due date according to the dependency type) and the lag.

You can select several predecessors, if needed, one by one. Also, Link/Unlink options allow setting predecessors/successors for the selected tasks in bulk. If edited in bulk, the dependency type will be Finish to Start. If the predecessor conflicts with an existing one during the bulk edit, it will be skipped.

Dependencies can be edited from the Predecessors panel.
It is possible to set the dependencies between the tasks from the same or different groups.

Key Restrictions:
Indent/Outdent Options:
- Dependencies that violate this rule cannot be created using the Indent or Outdent options.
- For example, if there is a dependency created between 2 tasks, it is not allowed to perform Indent/Outdent in case one of the tasks will become a parent or child of another one.
Link/Unlink Options:
- The same restriction applies to the Link functionality.
- Dependencies can only be created between tasks that comply with this rule. Any invalid links will be ignored.
Drag-and-Drop:
- When using drag-and-drop functionality, an invalid dependency is supposed to be created, and the action is canceled.
- Only valid dependencies will be established during this action.
Handling Existing Dependencies for Existing Invalid Dependencies:
- If there are already dependencies in the system that violate this rule, users will encounter an error message when opening/saving the successor task in the affected dependency.
- In order to save the successor task, the affected dependency must be removed.
Adding a Predecessor to a Summary Task:
- If a user adds a predecessor to a summary task, the summary task Start/Due dates will not be calculated from the related Predecessor because the Summary task dates are rolled up from its child tasks.
You can also include the Predecessor field in a custom view, and all predecessors will be listed next to the successor task, showing the information about dependency type and lag (if there are several tasks, you can navigate to each one to see the hint with all the information).

Dependencies can be deleted from the timeline directly.

When there is only one task Predecessor, and it is removed (from Details, Predecessors, Gantt), the task’s Start/Due Date will remain unchanged.
When one of several task’s Predecessors is removed (from Details, Predecessors, Gantt), the task’s Start/Due Date is adjusted to correspond to other predecessor’s constraints, i.e. task’s Start/Due Date will be moved back to correspond to remaining constraints, if the Predecessor that was just removed has been stretching the gaps between the task and other predecessors beyond their lag values.