
To configure the tenant time zone, data synchronization, summary notification settings, and more, click the gear icon in the upper-right of the screen and select Tenant Settings.

On the Tenant Settings page, use the navigation panel on the left to quickly access the required section. You can hide or expand when needed.

Features and Modules
This section allows enabling/disabling features and modules for the whole tenant.
Time Tracking feature is ON by default. For more details about the Time Tracking functionality, please refer to this article.
Private Projects is ON by default. For more details about private projects, please refer to this article.
Presentation Mode feature in PPM Express allows users to open a selected project as a dedicated presentation page, instead of landing on the regular project dashboard.
This is particularly useful for displaying Project Story content, which delivers AI-powered project reports that summarize key data insights and provide automatic updates on project progress using advanced language models. When the Presentation Mode is turned ON, the Project Story feature is enabled automatically. For more details, please refer to the Project Story for PPM Express articles.

Style
The Style section allows to customize the logo and the style of the navigation panel on the tenant level.
The Custom Logo option supports PNG formats. For the best view, use an image with a size of 130x32 pixels and a transparent background.
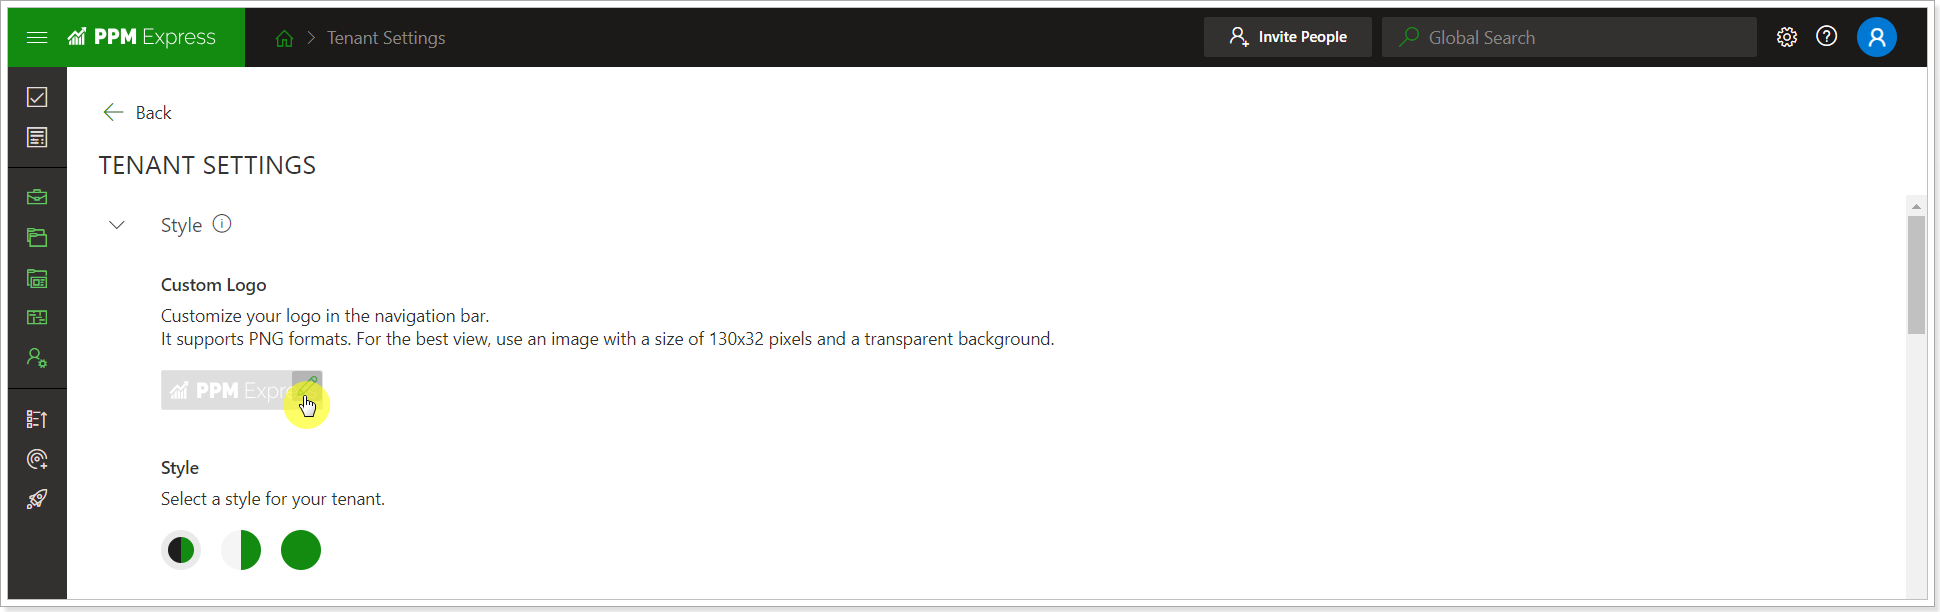
The Style option allows selecting the colors for the navigation panel on the left and on the top.
Organization Authentication
The Organization Authentication section allows defining the access settings for your PPM Express tenant.
There are four organization authentication types available:
- Office 365
- Okta (This authentication method cannot be used to create a tenant. The tenant must first be created using the Email authentication option. Once the tenant is created, the Okta authentication method can be enabled and configured at the tenant level, allowing users from the Okta tenant to sign in to PPM Express using this authentication type.
For detailed instructions on configuring Okta authentication, please refer to this article.
To learn more about enabling Okta authentication for your PPM Express tenant, please contact our Support team at support@ppm.express)
If the tenant was created using the Email option, you can switch to the Office 365 default authentication type. This can be done only once and cannot be changed back later. To switch to the Office 365 default authentication type, it is required to link your Office 365 organization to PPM Express. For more details, please refer to the 'How to switch from Email to Office 365 default authentication' article.
To allow users from the same Office 365 or GSuite tenant to sign up for the PPM Express tenant, the PPM Express Administrator should open the Settings => Tenant settings page => Organization Authentication and set the 'Auto Registration' setting to 'ON' (it is set to 'ON' by default).

If your organization would like to add users to the PPM Express tenant by invitation only, set the 'Allow Auto Registration' setting to 'OFF'.
All PPM Express users can invite others using the 'Invite People' button, provided the PPM Express Administrator has enabled the 'Open Invites' option on the Tenant Settings page. Only PPM Express Administrators can invite other users if this option is off.

It is also possible to invite users from the Project/Programs/Portfolio dashboard => Share Project page if the 'Open Invites' option is enabled by the PPM Express Administrator. For this purpose, open the Project, Programs, or Portfolio dashboard => Configure menu => Share => type in the user's email you need to invite.

The Project Manager can grant the required permission, which can be changed by the PPM Express Administrator on the People Management page.
Using the Permitted Authentication Providers option, the PPM Express Administrator can allow/restrict the authentication providers for the tenant. Only the authentication providers turned on for the organization will appear on the 'Log in to PPM Express' page for the tenant.

If the authentication provider is in use, for example, the invitation was sent using the Email option, the Administrator will not be able to restrict this authentication type.
Before turning off the provider that is in use, it will be necessary to:
- deactivate all users who use this provider with Active status;
- delete all users with Invite Pending status with this authentication provider defined in the System field or change the Auth Provider to a different one.
After this, it will be possible to restrict the authentication provider.
The user can be deactivated on the People Management page, and the allowed providers can be applied to the users in bulk.
It is impossible to change the provider for Active or Inactive users. If, for example, users were invited to the tenant using the Email provider and then this authentication type was deactivated on the Tenant settings page, these users cannot be activated (if they are inactive) on the People Management page. These users can be activated only after the Email provider is turned on. The authentication type can be changed only for users with a Pending Invite status.

The default authentication provider for invitations option defines the default authentication provider for sending the invitations. If the default authentication type is selected, only PPM Express Administrators can change the authentication provider when inviting new users. For all other users, the default authentication provider for invitations will be pre-selected without the ability to change it.

Please refer to the 'How to invite users to PPM Express' article for more details.
Global Settings
The Global Settings section allows setting up the Tenant timezone, the Regional format (date format), and the First day of the week.
The following data will be updated automatically daily at midnight according to the selected timezone:
- Statuses of the imported/internal Tasks and Key Dates;
- Project, Programs, and Portfolio statuses (on condition that the auto-calculation option is enabled on the Insights settings page);
- Outdated Projects section on the Insights page (all other Insights sections are updated automatically on any changes performed by users to their Projects);
- PPM Express warnings.

For example, if there is a Key Date where the Date value is set for today, the status of this Key Date will be updated automatically at midnight according to the Tenant timezone settings (unless the status is not changed manually).
If the Thresholds are changed for auto-calculation of Project/Program/Portfolio Statuses on the Insights settings page, the statuses will be recalculated automatically at midnight according to the Tenant time zone setting.
Schedule Project Status and Overall Project Status will be updated automatically as soon as a new Key Date is added or the status of the Key Date is changed (either manually or synchronized from external systems).
Schedule Project Status and Resources Status will be updated automatically at once when a new Task with an assignment is created or an existing task is updated.
Issues and Risks Project Statuses will be updated as soon as new risks and issues are created or existing ones are updated (either manually or synchronized from external systems).
Cost Project Status will be updated as soon as the Budget Project section changes.
Information on the Insights page is also updated automatically at once when users perform any changes to their Projects.
The Regional Format setting allows you to define the date and time format to be displayed in the PPM Express user interface and when exported to .csv. When importing data from the .csv file, it is possible to import it using the format according to the selected region or an international format (YYYY-MM-DD).
To change the date and time format, open the Tenant Settings page -> Global Settings -> click on the Regional format drop-down and select the required format. You can check how dates and times will appear on PPM Express pages in the Example below this setting.

The Start of the Calendar Week setting allows selecting the first day of the week that will be used in timeline views and the resource plan grid when in weekly mode.

By default, all existing and new tenants will continue using Sunday as the start of the week. Changing this setting updates all calendar-based views across the product, including:
- My Space weekly views
- My Time page, the start of the week
- Date pickers, counters, date fields, weekly filters, and timelines
- Resource planning grids
Once updated, all weekly calculations, views, and counters are automatically recalculated according to the new start day (for example, from Sunday to Monday).
Please note: For the Budget and Benefits sections, these changes will not be applied.
Data synchronization settings
Synchronization schedule. This dropdown defines the exact day-to-day time when the synchronization from the external systems will be performed.
Completed and inactive PPM Express projects are not included in data synchronization by schedule (if Project Progress is set to Completed, On Hold, or Cancelled and/or if Project Stage Category is set to Closing, Suspended, or Cancelled and/or if the Overall Project Status is set to Done).

Send synchronization alerts. Using this option, you can select the recipients and decide how often the 'data synchronization failed' email is sent.
If the email is not selected, the notification will not be sent.
Notifications settings
PPM Express allows setting up daily and weekly notifications sent to Microsoft Teams or by Email.
To enable these notifications, it is required to open the notification settings section and set the required weekday and time for the Daily notifications and the required weekday and time for Weekly notifications.
The 'Use email notifications' option allows enabling/disabling email user notifications (when the user is assigned to PPM Express items) on the tenant level for all users at once.

When you select the required day and time the changes are saved automatically.
For more information about PPM Express notifications, please refer to the Teams and Email notifications article.
Resource Planning
The Resource Planning setting allows you to choose where the Resource Planning feature will be available: on the Projects, Programs, or Portfolios level.
The Project level is selected by default. The Resource Plan logic is the same for all levels. All Resource fields are available on the Program, Portfolio, and Project dashboards, but data for these fields will be visible depending on the level selected. If the Project level is selected, then the Resource fields will be active on the Project dashboard.

Once the level is changed, Resource Planning will appear on the newly selected level and disappear from the previously selected one. For example, if you switch from the Project level to the Program, the Resource Plan section will disappear from the Project dashboard. It will become available on the Program dashboard. Also, if you open the previously allocated Resource on the Project, data will not be visible and you will be able to allocate the resource on the Program.

The data will not be deleted from the Resource Plans created on the previously selected level, it will be hidden from the application. In case the setting is changed back, existing data will become visible again.
Default Project Settings
Project Progress Calculation
The Project Progress Calculation setting allows selecting the default % Progress Calculation rule for PPM Express tasks, task groups, and rolled-up Project progress.
When a new Project is created, a formula based on Completed Work and Effort is used by default. The PPM Express Administrator can change the default calculation type for the whole tenant (it will be applied when creating new Projects). When the Project is created, Project managers can switch the Progress % formula for their Project to a different one as needed.
For all existing Projects, this setting does not change the calculation rule selected by the Project manager.

Calculated Automatically
Define the default behavior for the project’s Start Date and Finish Date in new projects. If the setting in ON, the project's Start Date and Finish Date are automatically rolled up from the primary schedule for all newly created Projects.
When ON, users can still edit the Start Date and Finish Date, but these values will update automatically if:
- The primary schedule is modified.
- The primary schedule is changed to a different one.
- If the primary schedule does not contain start/finish dates, the manually entered dates will remain unchanged.
If the setting is OFF, users must manually set the project’s Start Date and Finish Date.

Project Managers can also define the behavior for the project’s Start Date and Finish Date per project under the Project Settings -> Calculated Automatically section.
Update Progress
This setting controls automatic synchronization of the Progress field with the Project State.

When the setting is on, the system updates the Progress field in all existing projects to match the Project State. This includes Completed, Canceled, and Suspended projects. Archived projects are excluded.
The Progress field is updated automatically whenever the Project State is updated.
Users can still manually update the Progress field, but any subsequent change to the Project State will automatically override the Progress field.
If a project is created from a CSV file or via the API, the system sets the first stage in the process by default.
If the Stage is synced from an external system, the Project State will update, and the Progress field value will update automatically.
Entra ID (formerly Azure AD) Resource Synchronization
The Entra ID (formerly Azure Active Directory) Synchronization option allows setting up field mapping between the PPM Express Resources page and Entra ID (formerly Azure AD).
Please refer to the How to set up fields mapping between PPM Express resources and Entra ID (Azure AD) article for detailed instructions.

Entra ID (Azure AD) User Synchronization
The Entra ID (formerly Azure Active Directory) Synchronization option allows synchronizing users from Entra ID (formerly Azure AD) groups to the PPM Express People Management page.
Also, using this option, the license type is applied in bulk, and the default set of PPM Express permissions can be set for all users from the selected Entra ID (formerly Azure AD) group according to their license. To create a default set of permissions, open the People Management page -> Default Permissions and set permissions for each license type as required.

When users are synchronized, the permissions can be edited manually for each user separately, if required.
When Entra ID (formerly Azure AD) user synchronization is enabled, all existing users within your tenant on the People Management page will be deactivated unless they are members of the Users or Team Members group from Entra ID (formerly Azure AD). Users with the Administrate app permission will not be deleted even if they are not members of any Entra ID (Azure AD) group selected for synchronization.
To synchronize users from Entra ID (Azure AD) to PPM Express, perform the following:
1. Select your organization. The organizations appear in the list for synchronization as soon as the connection is established between PPM Express and Office 365. This can be done if you add one of the following connections to PPM Express:
- Planner connection (when importing or linking Projects/Programs/Resources)
- Teams connection (Work Together option)
- Office 365 group connection (Work Together option).

It is possible to add a restricted connection. It can be used only for Entra ID (Azure AD) user and resource synchronization or resource import. It still requires Admin consent, but limited permissions are used: User.Read.All and GroupMember.Read.All. This type of connection can be added only from the Import Resources page.
2. Select the Entra ID (Azure AD) group for the User license (User license will be applied to all users from this group). Select the Entra ID (Azure AD) group for the Team Member license (Team Member license will be applied to all users from this group). These groups should be created in Entra ID (Azure AD) in advance, or any existing group can be used if it works.

3. Set up the Daily synchronization schedule.
To launch an on-demand synchronization, use the Synchronize Now option below.

4. Decide what status should appear on the People Management page for the synchronized users and if users receive invitations during synchronization.
If the first option, 'New Users/Team Members are created with Pending invite status, but invitation emails are not sent,' is selected, the synchronization with Entra ID (Azure AD) will run without sending invites to users. The invitation emails can be sent manually from the People Management page to all or selected users.
If the second option, 'New Users/Team Members are created with Pending invite status, and invitation emails are sent,' is selected, as the synchronization is completed, all users will receive an email notification with an invitation to join the PPM Express tenant. When users follow the link from the email and log in to PPM Express, they become active users on the People Management page. They can perform actions according to their permissions.
When the invitations are sent, users can select the authentication type available for the tenant. By default, the following types are available: Office 365, Gmail, or Email. If you need your users to select the Office 365 type, we recommend turning off all other types for the tenant. This can be done on the Tenant Settings page, Organization Authentication section.
If the third option, 'New Users/Team Members are created with Active status' is selected, all new users/team members added to Entra ID (Azure AD) groups for User and Team Member licenses will be automatically activated upon synchronization with Entra ID (Azure AD). They will appear on the People Management page with an Active status and can join the tenant without receiving an invitation email.

If the users have a Pending invite status, the user invitations can be turned on separately and sent to all or selected users set in Entra ID (Azure AD) groups. Open the People Management page, select the users, and click the 'Resend invitation' button.

Enable the synchronization with Entra ID (Azure AD).

If there is a need to change the license type for users, it is required to change their group in Entra ID (Azure AD) (from Team Member to User or vice versa). After synchronization, the license type will be changed in PPM Express. The display name and users' email should also be changed via Entra ID (Azure AD). If there are Guest users in Entra ID (Azure AD) for whom there is a need to edit email, the original user email should also be edited similarly. Otherwise, the Guest user will be added as a separate user to PPM Express.
The Last Sync option shows the date and time of the last synchronization.
If the synchronization fails, a corresponding notification will be sent to the emails provided in the Data Synchronization settings Recipients field.

When users are synchronized from Entra ID (formerly Azure AD), and the synchronized group includes other groups, users are synchronized from the related groups.
When users are synchronized from Entra ID (Azure AD), they may appear on the People Management page with the Inactive status (depending on the synchronization option selected). Ensure that the 'All' option is selected in the filter on the People Management page to see all users that were added by synchronization from Entra ID (Azure AD). Alternatively, you can choose the 'Inactive' option to see the list of these users.

Resources will be created for each user as soon as the users log in to PPM Express.
Extensions
This section can be used to add/embed custom content to the PPM Express pages. For example, embedded content can be added and shown to all users on the Quick Start page instead of the default one. Another example is when a link can be added as an extension to open a specific site from the Portfolios page, or open it in a new tab.
For more details, please refer to this article: How to add and use Extensions.

Presentation Mode
When the Presentation Mode setting is turned on in Tenant Settings -> Features and Modules, the Project Story setting is enabled automatically. It allows opening a regular Project Dashboard as a dedicated presentation page, instead of the regular project dashboard view.

Presentation Mode and Project Story are available for Enterprise and Enterprise Ultra subscription plans, but differ in functionality:
In the Enterprise Plan, the Presentation Mode supports Project Story only. If Project Story is disabled, Presentation Mode becomes unavailable.
In the Enterprise Ultra, the Presentation Mode supports Project Story and can also be used to embed other external content, such as Power BI dashboards, by providing a custom URL (turn off Project Story and enter the URL for your custom content).
For more details, please refer to this article.